how to properly maintain your home sump pumps in spring
Spring is the time when your sump pump should be working like a champ. After months of dry weather, the ground starts to thaw, and the risk of basement flooding spikes. A sump pump that's been neglected or clogged can turn your basement into a swamp. I've seen it happen more times than I can count—water backing up, walls sweating, and homeowners scrambling. The truth is, a sump pump is one of the simplest, most reliable ways to keep your basement dry. But only if you take the time to maintain it right before the season starts.
Our Top Picks
Affiliate disclosure: if you buy through these links, we may earn a commission at no extra cost to you.

Don’t wait until it’s too late. A little time and effort now can save you thousands in damage later. You don’t need fancy tools or a degree in engineering—just a few basic supplies, a bit of know-how, and a willingness to dig in. I’ve spent years under the hood of every kind of plumbing system, and I’ll tell you this: a well-maintained sump pump is the difference between a dry basement and a flood nightmare.
Liberty Pumps 237 1/3 HP Submersible Sump Pump
$200.25Check PriceA recovered top-picks entry restored from the saved product data for this article.

Superior Pump 91570 3300GPH Thermoplastic Submersible Utility Pump with 10-Foot Cord, 1/2 HP
$93.42Check PriceA recovered top-picks entry restored from the saved product data for this article.
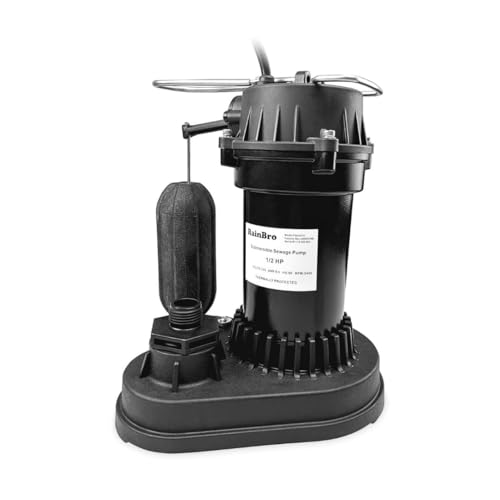
Rainbro 1/2 HP Thermoplastic Submersible Sump Pump With Vertical Float Switch, Utility Pump, Model# PSU051V
$89.99Check PriceA recovered top-picks entry restored from the saved product data for this article.
Table of Contents
Check the Pump and Switch
Start by removing the cover of your sump pump. Look for signs of wear, rust, or corrosion. The pump itself is the heart of the system, and if it's been sitting idle, it might have settled or developed a leak. I’ve seen too many pumps that look fine on the surface but are failing underneath. If the motor is warm to the touch, that’s a good sign. But if it’s cold and dry, it might not be getting power or moisture to activate properly.
Next, check the float switch. This is the part that triggers the pump when water rises. Make sure it’s not stuck, clogged, or damaged. A float that’s been sitting in the sump for months can get coated in sludge and not move at all. If it’s not moving, your pump won’t kick in when it needs to. A quick test with a small bucket of water can tell you if the switch is working. If it doesn’t activate, you’re in trouble.
Clean the Weir and Discharge Line
The weir is the part of the sump pump that lets water flow in before the pump kicks on. It’s usually a small screen or grate. Over time, dirt, sand, and debris can build up on it, causing the water to pool and not flow smoothly. I’ve seen sumps that look clean but are clogged with fine sediment—this is a classic mistake.
Use a small brush or a wire hanger to clean the weir. If it’s too dirty, replace it. Then, check the discharge line. It should be free of kinks, blockages, or cracks. A cracked line can let water back into the basement. If you see any damage, replace it immediately. A discharge line that’s too long or too short can also cause problems, so make sure it’s properly routed and secured.
Inspect the Float Switch and Housing
The float switch is a critical component that tells the pump when to turn on. If it’s not working, your sump pump is useless. Inspect the housing for cracks or leaks. A cracked housing can let water in and cause the pump to short out. I’ve had to replace more than a few housings that looked fine on the outside but had internal damage.
Make sure the float moves freely. If it’s stuck, it could be because of debris or corrosion. Try to move it by hand. If it doesn’t budge, it’s time to replace the switch. Also, check the wiring. If the wires are frayed or exposed, you’re risking a short circuit. A little time spent now can save you from a big problem later.
Test the Pump and Drainage System
Once you’ve cleaned and inspected the components, it’s time to test the system. Fill the sump pit with water up to the float switch level. The pump should activate and run for a few minutes. If it doesn’t, there’s a problem. If it runs but doesn’t drain properly, check the discharge line again.
Also, make sure the drainage system is clear. If the discharge line is leading to a dry area, you’re setting yourself up for a flood. The line should drain to a safe location—ideally a ditch or a storm drain. If it’s not, you need to redirect it or install a secondary pump. I’ve seen too many homes flood because the discharge line was improperly installed.
Replace Parts That Fail
Some parts just wear out over time. The pump motor, float switch, and discharge line are the most common culprits. If you notice the pump isn’t running, the float isn’t moving, or the line is cracked, it’s time to replace the part. Don’t try to patch it up with a quick fix. A broken pump or a cracked line can lead to a basement flood in minutes.
When replacing parts, go with quality over cheap. I’ve seen too many homeowners save a few bucks on a float switch, only to have it fail within a month. Invest in a reliable brand. If you’re unsure, ask a local plumber or look up reviews. A good sump pump can last 10 years or more with proper care.
Set Up a Maintenance Schedule
Even the best sump pump can fail if you don’t maintain it regularly. Set up a schedule to check your sump pump every spring and every fall. I’ve seen homeowners who think they’re done once the snow melts, but the real test is in the spring when the ground thaws and the water flows.
Include a checklist: clean the weir, inspect the float switch, test the pump, and check the discharge line. If you’re not sure how to do it, take a class or watch a video. But don’t skip it. A well-maintained sump pump is your best defense against basement flooding. And trust me, it’s worth the effort.
Frequently Asked Questions
How often should I test my sump pump?
Test your sump pump at least once a month during the spring and summer. If you live in an area with heavy rainfall, test it more frequently. A quick test with a garden hose can simulate a heavy rain event.
Can I use a regular garden hose to clean the sump pump?
Yes, but use a hose with a nozzle that allows you to control the flow. Too much pressure can damage the pump or float switch. A gentle stream is best.
What should I do if my sump pump won’t turn on?
First, check the power supply. Then, test the float switch and ensure the weir is clear. If it still doesn’t work, the pump may be faulty and needs replacement.
Is it okay to use a cheap float switch?
No. Cheap float switches are prone to corrosion and failure. They can fail at any time, leaving your basement vulnerable to flooding. Always use a quality switch from a trusted manufacturer.
How do I know if my discharge line is clogged?
Look for water pooling around the sump pump or the pump running but not draining. If the line is clogged, you’ll see water backing up into the basement. Use a garden hose to clear it or replace the line if it’s damaged.
Can I install a sump pump myself?
Yes, but it requires some basic plumbing skills and tools. If you’re not confident, hire a professional. A bad installation can lead to more problems than you bargained for.
Don’t wait for the first rain of spring to realize your sump pump is broken. Take the time now to check, clean, and test your system. A few minutes of work can save you thousands in damage. If you’re not sure what to do, call a plumber. But don’t skip the maintenance—your basement depends on it.